Archive for 2012年12月22日
Java EE 7 WebSocket Client Sample Application with JavaFX
At the previous entry, I wrote how to WebSocket application on Server Side. However JSR 356 Java API for WebSocket is providing Client API also. So in this entry, I will explain the WebSocket Client API with JavaFX.
The image of this application is like following video. There is one button on the bottom of application. If you click the button, the application connect to WebSocket Server and receive the messages and show the message on the TableView.
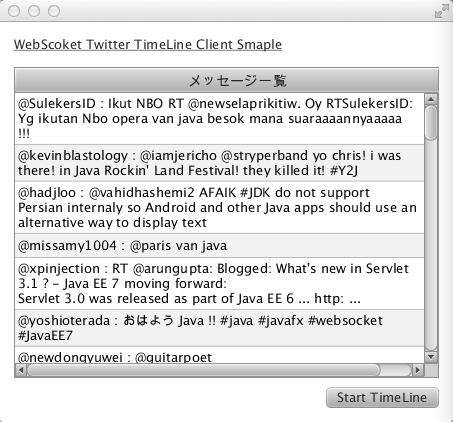
The example of running Application
Preparation :
In order to compile and run the application, you need following libraries.
* grizzly-framework-2.2.19.jar
* grizzly-http-2.2.19.jar
* grizzly-http-server-2.2.19.jar
* grizzly-websocket-2.2.19.jar
* tyrus-servlet-1.0-b08.jar

You can download the Grizzly related libraries from following site.
http://grizzly.java.net/nonav/docs/docbkx2.2/html/dependencies.html
* Grizzly is a popular NetWork Server framework which is wrote by Java NIO. And originally the grizzly was created for the server engine for GlassFish. It has high scalability and good performance. If you use the grizzly libraries, you don’t need to write the low level socket programing by Java.
In this client application, I will use the Grizzly to connect the WebSocket Server with less code.
Also, you need to get the jar file as tyrus-servlet (reference implementation of Java API for WebSocket) and it include the javax.net.websocket package. Please get the libraries from following site ?
http://repo1.maven.org/maven2/org/glassfish/tyrus/tyrus-servlet/1.0-b08/
Then I will start to create a NetBeans Project by selecting JavaFX FXML Application.

In this Project, I will specified the project name as “JavaFX-WebSocket”. After that in order to be able to use the downloaded libraries in the project,I configured and added the libraries to the project.
If the project had created successfully , following 3 classes will be created by NetBeans.
”JavaFXWebSocket.java”, ”Sample.fxml”, ”SampleController.java”.

I will try to update the above 3 classes as follows. At first , I will customize the view(FXML). If you already configured the SceneBuilder, you can show the SceneBuilder screen on your desktop after you click the Sample.fxml file on NetBeans Project.
This Sample Application is very simple. So I only change the size of the Window and added two component as Label and TableView. After drag and drop these component, I inserted the ID as “table” for TableView. And there is TableColumn inside of TableView. So I specified the ID as “column” for TableColumn.

If you change the screen, you may get the FXML code like follows.
<?xml version="1.0" encoding="UTF-8"?>

<?import java.lang.*?>
<?import java.util.*?>
<?import javafx.scene.*?>
<?import javafx.scene.control.*?>
<?import javafx.scene.layout.*?>

<AnchorPane id="AnchorPane" prefHeight="400.0" prefWidth="453.0" xmlns:fx="http://javafx.com/fxml" fx:controller="javafx.websocket.SampleController">
  <children>
    <Button fx:id="button" layoutX="326.0" layoutY="365.0" onAction="#handleButtonAction" text="Start TimeLine" />
    <Label fx:id="label" layoutX="126.0" layoutY="120.0" minHeight="16.0" minWidth="69.0" />
    <Label layoutX="14.0" layoutY="14.0" prefWidth="292.0" text="WebScoket Twitter TimeLine Client Smaple" underline="true" />
    <TableView fx:id="table" layoutX="14.0" layoutY="45.0" prefHeight="311.0" prefWidth="425.0">
      <columns>
        <TableColumn id="" maxWidth="445.0" prefWidth="445.0" text="Message List from Twitter" fx:id="column" />
      </columns>
    </TableView>
  </children>
</AnchorPane>
After customize the View, I will start to implement the Controller of JavaFX. For JavaFXWebSocket.java , there is no need to modify in this application. So I will use the NetBeans created code.
package javafx.websocket;

import javafx.application.Application;
import javafx.fxml.FXMLLoader;
import javafx.scene.Parent;
import javafx.scene.Scene;
import javafx.stage.Stage;

public class JavaFXWebSocket extends Application {

    @Override
    public void start(Stage stage) throws Exception {
        Parent root = FXMLLoader.load(getClass().getResource("Sample.fxml"));

        Scene scene = new Scene(root);

        stage.setScene(scene);
        stage.show();
    }

    public static void main(String[] args) {
        launch(args);
    }
}
I implemented the SampleController.java as follows. At first , I inserted the “@FXML TableView table” and “@FXML TableColumn column”. The field name is the same id of FXML(fx:id=”table”, fx:id=”column” ). And I implements the action of push the button on handleButtonAction method. Twitter Streaming is long running process. So I need to implement the check program as multi thread. At JavaFX ,javafx.concurrent.Service, javafx.concurrent.Task classes is prepared to implement the Task. So I had used the Service class to do it.
package javafx.websocket;

import java.net.URI;
import java.net.URISyntaxException;
import java.net.URL;
import java.util.ResourceBundle;
import java.util.concurrent.CountDownLatch;
import java.util.concurrent.TimeUnit;
import java.util.logging.Level;
import java.util.logging.Logger;
import javafx.concurrent.Service;
import javafx.concurrent.Task;
import javafx.event.ActionEvent;
import javafx.fxml.FXML;
import javafx.fxml.Initializable;
import javafx.scene.control.TableColumn;
import javafx.scene.control.TableView;
import javafx.scene.control.cell.PropertyValueFactory;
import javax.websocket.ClientEndpointConfiguration;
import javax.websocket.DefaultClientConfiguration;
import javax.websocket.DeploymentException;
import org.glassfish.tyrus.client.ClientManager;

public class SampleController implements Initializable {

    @FXML
    private TableView table;

    @FXML
    private TableColumn<RowData,String> column;

    @FXML
    private void handleButtonAction(ActionEvent event) {
        TwitterCheckService thread = new TwitterCheckService(table);
        thread.start();
    }

    @Override
    public void initialize(URL url, ResourceBundle rb) {
        table.setEditable(true);
        column.setResizable(true);
        column.setCellValueFactory(new PropertyValueFactory<RowData, String>("message"));
    }

    class TwitterCheckService extends Service {

        private TableView table;
        private CountDownLatch messageLatch = null;

        public TwitterCheckService(TableView table) {
            this.table = table;
        }

        @Override
        protected Task createTask() {
            Task<Void> task = new Task<Void>() {
                @Override
                protected Void call() throws Exception {
                    messageLatch = new CountDownLatch(1);
                    try {
                        URI clientURI = new URI("ws://localhost:8080/TwitterTimeLine/twitter");
//            ClientContainer cliContainer = ContainerProvider.getClientContainer();
                        ClientManager cliContainer = org.glassfish.tyrus.client.ClientManager.createClient();

                        ClientEndpointConfiguration clientConfig = new DefaultClientConfiguration();
                        cliContainer.connectToServer(new TwitterClient(table), clientURI);
                        messageLatch.await(1, TimeUnit.SECONDS);
                    } catch (DeploymentException | URISyntaxException | InterruptedException ex) {
                        Logger.getLogger(SampleController.class.getName()).log(Level.SEVERE, null, ex);
                    }
                    return null;
                }
            };
            return task;
        }
    }
}
In the above class, there is initialize() method to initialize the class. In the method, I wrote column.setCellValueFactory(new PropertyValueFactory(“message”)) . This is the value configuration of the Table column. In fact, the field of “message” in RowData class will be showed on every column in the Table. I specified the javafx.scene.text.Text type instead of String type, because it was difficult to manage the size of String in the Column of TableView. So instead of String, I used the Text and Text#setWrappingWidth could manage the size of viewable String.
package javafx.websocket;

import javafx.scene.text.Text;

public class RowData {

    private Text message;

    public RowData(Text message) {
        this.message = message;
        message.setWrappingWidth(400);
    }

    public Text getMessage() {
        return message;
    }

    public void setMessage(Text message) {
        this.message = message;
    }
}
I will pick up and explain the important point of WebSocket Client in SampleController class as follows. I wrote the comment in the code as “// ClientContainer cliContainer = ContainerProvider.getClientContainer();” In fact the above code is recommended as standard. And you should write the following property on the system property.
“webocket.clientcontainer.classname= actual class name ”
However in this programing , I faced the error. Thus I wrote the following in order to get the instance of ClientContainer. “ClientManager cliContainer = org.glassfish.tyrus.client.ClientManager.createClient();”
            URI clientURI = new URI("ws://localhost:8080/TwitterTimeLine/twitter");
//            ClientContainer cliContainer = ContainerProvider.getClientContainer();
            ClientManager cliContainer = org.glassfish.tyrus.client.ClientManager.createClient();

            ClientEndpointConfiguration clientConfig = new DefaultClientConfiguration();
            cliContainer.connectToServer(new TwitterClient(table), clientURI);
            messageLatch.await(20, TimeUnit.SECONDS);
I specified the “TwitterClient(table)” inside of cliContainer.connectToServer(new TwitterClient(table), clientURI) line. It is a WebSocket Client code which equal to the class of adding the @WebSocketEndpoint annotation at the server side. Instead of the “@WebSocketEndpoint” annotation, we must specify the “@WebSocketClient” annotation at the client side code. Following is the client side code of WebSocket client.
package javafx.websocket;

import javafx.collections.ObservableList;
import javafx.scene.control.TableView;
import javafx.scene.text.Text;
import javax.websocket.Session;
import javax.websocket.WebSocketClient;
import javax.websocket.WebSocketClose;
import javax.websocket.WebSocketMessage;
import javax.websocket.WebSocketOpen;

@WebSocketClient
public class TwitterClient {

    TableView table;
    ObservableList<RowData> list;

    public TwitterClient(TableView table) {
        this.table = table;
    }

    @WebSocketOpen
    public void onOpen(Session session) {
        System.out.println("Connection had opened.");
    }

    @WebSocketMessage
    public void onMessage(String message) {
        if (message.length() == 0) {
            return;
        }
        // In order to adjst the size of String in Table, I used Text.
        Text text = new Text(message);

        list = table.getItems();
        list.add(0,new RowData(text));
    }

    @WebSocketClose
    public void closeConnection(Session session) {
        System.out.println("Connection had closed.");
    }
}
Actually the code is very similar to the server side code. Instead of the @WebSocetEndpoint, I specified the @WebSocketClient annotation. And inside of the class, we can implements the method which is added @WebSocketOpen, @WebSocketMessage and @WebSocketClose annotation. In this program, client receive the message from the server. And there is no need to send the data to server. So I implemented the @WebSocketMessage public void onMessage(String message) method. In this method, the client receive the message from server and wrapping the String to Text object in order to adjust the length of the viewable String (Text text = new Text(message)). Finally the message is inserted into the first line of the Table.
This WebSocket client code is very easy to implement. So you can write the WebSocket program very easily not only server side but also Java Application like JavaFX.
Java EE 7 WebSocket Server-Side Programing with Twitter4J
In this entry, I will explain the new feature of Java EE 7. In Java EE 7, Java API for WebSocket (JSR-356) will be included.
I explained these technology at Japanese Java conference as follows. At that time, I showed the Twitter Timeline demo by using the WebSocket. So I will explain following how to create WebSocket application as standard technology of Java.

Now Java EE expert group is developing and evaluating the specification of JSR-356 Java API for WebSocket. So it may be possible to change the coding style when the Java EE 7 had released officially release at next year (We are planning to release the Java EE 7 at 2013 Spring). So please note this point ?
This program was created for GlassFish 4.0 b58 environment at November. You can download the promoted build of GlassFish v4.0 from following site. So please download it before the coding ?
http://dlc.sun.com.edgesuite.net/glassfish/4.0/promoted/
Latest version of the GlassFish was “glassfish-4.0-b67.zip”. (2012/12/20)
It seems that already the API had changed during this one month. Arun Gupta already mentioned about it on following entry.
WebSocket Samples in GlassFish 4 build 66 – javax.websocket.* package: TOTD #190
So if you get the latest version of the GlassFish, please refer to the above entry too?
And you need to get the “Twitter4J” libraries from following site before coding. Twitter4J. Twitter4J is very very useful libraries to create Twitter service by Java. Twitter4J is created by Japanese guyes whose name is Yusuke Yamamoto-san.
Actually I got two libraries as follows.
* twitter4j-core-2.2.6.jar
* twitter4j-stream-2.2.6.jar
Perhaps as you may know, WebSocket is able to communicate by Full duplex and bi-directional between Client and Server. And it is used the upgrade protocol of HTTP protocol as WebSocket protocol.
Once WebSocket connection had established, it is possible to write the program depends on the WebSocket lifecycle.
* Open (@WebSocketOpen)
* Receiving the Message (@WebSocketMessage )
* Error (@WebSocketError)
* Close (@WebSocketClose)
I will show the sample code of getting the Twitter Timeline as follows. At first, you need to specify the @WebSocketEndpoint annotation to the Java class. And you need to specify the context root in the argument of the annotation. For example, if you specify following,
@WebSocketEndpoint(value = “/twitter”) // since build 61
the client can connect to the server by using following
“ws://WEBSOCKET-SERVER/APP_NAME/twitter”.
And I implemented two method on the class as initOpen, closeWebSocket. And also I specified two annotation as @WebSocketOpen, @WebSocketClose.
* @WebSocketOpen initOpen : if the client access to the server, it inserted the Session to the Set(peers). Session has the information of RemoteEndpoint(client).
@ @WebSocketClose closeWebSocket : if the connection had cut, it delete the Session from the Set(peers). Session has the information of RemoteEndpoint(client).
package jp.co.oracle;

import java.io.IOException;
import javax.net.websocket.Session;
import javax.net.websocket.annotations.WebSocketClose;
import javax.net.websocket.annotations.WebSocketEndpoint;
import javax.net.websocket.annotations.WebSocketMessage;
import javax.net.websocket.annotations.WebSocketOpen;

@WebSocketEndpoint(path = "/twitter") // build 58
// @WebSocketEndpoint(value = "/twitter") build 61
public class TwitterWebSocket {

    @WebSocketOpen
    public void initOpen(Session session) {
        TwitterClientSingleton.peers.add(session);
    }

    @WebSocketClose
    public void closeWebSocket(Session session) {
        TwitterClientSingleton.peers.remove(session);
    }
}
Next, I created Twitter monitoring program by using Singleton EJB with Twitter4j lib. In this program, if the EJB received the new message from Twitter, the EJB automatically send the message to all of connected WebSocket Client. In the EJB, I had used the Streaming API of Twitter4J. And also I specified two annotation to the class as @Startup and @Singleton. Thus, the EJB will be automatically initialized and started the service by EJB Container when the application is started.
Once EJB had loaded, initTwitterStream() method will be called by container because @PostConstruct annotation is specified to the method. In the method, it initialized Twitter4J API and it is using the Twitter Stream API. And in this example, I specify the search keyword as “java”.
In the Twitter4J, StatusAdapter is provided and onStatus() method can receive the message when the above filter had matched. So I wrote the code of publishing the message to all of connected RemoteEndpoint in this method. Of course if you would like to write JSON, you can do it.
(* NOTE: If you would like to receive the message from client, you can write the method with @WebSocketMessage annotation.)
package jp.co.oracle;

import java.io.IOException;
import java.util.Collections;
import java.util.HashSet;
import java.util.Set;
import java.util.concurrent.Future;
import javax.annotation.PostConstruct;
import javax.ejb.Singleton;
import javax.ejb.Startup;
import javax.net.websocket.SendHandler;
import javax.net.websocket.SendResult;
import javax.net.websocket.Session;
import twitter4j.FilterQuery;
import twitter4j.Status;
import twitter4j.StatusAdapter;
import twitter4j.TwitterStream;
import twitter4j.TwitterStreamFactory;
import twitter4j.User;

@Startup
@Singleton
public class TwitterClientSingleton extends StatusAdapter {

    private static TwitterStream twStream = null;
    public static Set<Session> peers = null; // Session の Set (The information of the RemodeEndpoint is includedn in Session object)

    static {
        peers = Collections.synchronizedSet(new HashSet());
    }

    @PostConstruct
    public void initTwitterStream() {
        //Initialize the Twitter Stream of Twitter4J
        twStream = TwitterStreamFactory.getSingleton();
        FilterQuery filter = new FilterQuery();
        filter.track(new String[]{"java"});
        twStream.addListener(this);
        twStream.filter(filter);
    }

    @Override
    public void onStatus(Status status) {
        // when the filter had matched this code will be called
        User user = status.getUser();
        if (status.getUser().getLang().equals("ja")) {
            String resStr = "@" + user.getScreenName() + " : " + status.getText();
            try {
                // I send the message to all of connected client as sequencial
                for (Session peer : peers) {
                    peer.getRemote().sendString(resStr);
                }
            } catch (IOException ioe) {
                ioe.printStackTrace();
            }
        }
    }
}
Finally, I will write the View. This View is very very simple. So you can write simply HTML or JSF or other. However in this example, I will write as JSF faceless. In the program, if this client receive the Twitter message from Server, onMessage() of JavaScript is called and show the message on the first line of the HTML Table.
<?xml version='1.0' encoding='UTF-8' ?>
<!DOCTYPE html PUBLIC "-//W3C//DTD XHTML 1.0 Transitional//EN" "http://www.w3.org/TR/xhtml1/DTD/xhtml1-transitional.dtd">
<html xmlns="http://www.w3.org/1999/xhtml"
      xmlns:h="http://java.sun.com/jsf/html">
    <h:head>
        <title>Twitter TimeLine Sample</title>
        <meta http-equiv="Content-Type" content="text/html; charset=UTF-8"/>
        <title>Twitter TimeLine Sample</title>
        <style type="text/css">
            table,td,th {
                width: 700px;
                border-collapse: collapse;
                border: 1px black solid;
            }
        </style>

        <script language="javascript" type="text/javascript">
            var wsUri = "ws://localhost:8080/TwitterTimeLine/twitter";
            var websocket = new WebSocket(wsUri);
            websocket.onopen = function(evt) { onOpen(evt) };
            websocket.onmessage = function(evt) { onMessage(evt) };
            websocket.onerror = function(evt) { onError(evt) };

            var  numberOfMessage;

            function init() {
                numberOfMessage = 0;
            }
            function onOpen(evt) {
                ;
            }

            function onMessage(evt) {
                writeToScreen(evt.data);
                numberOfMessage++;
            }

            function onError(evt) {
                writeToScreen('<span style="color: red;">ERROR:</span> ' + evt.data);
            }


            function writeToScreen(messages) {
                var table = document.getElementById("TBL");
                var row = table.insertRow(0);
                var cell1 = row.insertCell(0);

                var textNode = document.createTextNode(messages);

                var z = numberOfMessage%2;
                if(z==1){
                    cell1.style.backgroundColor="#ADD8E6" ;
                }
                cell1.appendChild(textNode);
            }

            window.addEventListener("load", init, false);
        </script>
    </h:head>
    <h:body>
        <h2>Twitter Time Line <BR/>WebSocket Sample Application!!</h2>
        <TABLE BORDER="1" ID="TBL">
        </TABLE>
    </h:body>
</html>
In order to run the Application, You need to get the consumer key and access Token from Twitter. http://twitter.com/oauth_clients/new After created the consumer key and access token, you need to write the following properties on twitter4j.properties file. And please placed the properties file to WEB-INF/classes ?
| # To change this template, choose Tools | Templates # and open the template in the editor. debug=false oauth.consumerKey=********************* oauth.consumerSecret=**************************************** oauth.accessToken=********-**************************************** oauth.accessTokenSecret=****** |
And also you need the following libraries to compile and run.
* Twitter4J: twitter4j-core-2.2.6.jar
* Twitter4J: twitter4j-stream-2.2.6.jar
* WebSocket: tyrus-servlet.jar (GlassFish-INSTALL/glassfish/modules)
* EJB : (GlassFish-INSTALL/glassfish/modules)
* CDI : (GlassFish-INSTALL/glassfish/modules)
I will show the directory structure of NetBeans project as follows.

Finally :
Perhaps you can understand that the Java API for WebSocket API is very very easy to use. And also if you use the Singleton EJB , it is very useful to monitor the backend service.
For example, please consider the DataBase monitoring instead of Twitter. If client request the DB update information to the Application Server, the Application Server will send the query to DB server for every individual request until now. However if you create the DB monitoring application like this, the load of DB may be extremery decrease.
Following is the demo video of this sample application.
WebSocket is the key technology included in the Java EE 7. And it is very easy to implement. If you are interested in the WebSocket on Java Platfor, please try to use the NetBeans and GlassFish v4.